Showing posts with label dessert. Show all posts

Wednesday, November 16, 2011

Nutella Tart

A dear friend of mine and I went to a cooking class last week, and the menu was to die for - especially this dessert.  I literally wanted to lick my plate, but being that we were supposed to act somewhat civilized, I restrained myself!   

I decided to try it out last night at home, and found that it is probably one of the easiest desserts to make.  Added bonus and perfect for the holidays!!

Nutella Tart
original recipe by Carmela Hobbins
serves 8-12

1 1/2 sticks of unsalted butter
1/3 C granulated sugar
1/2 tsp. pure almond extract
1 1/2 C all purpose flour
1 C Nutella
1/2 C semisweet chocolate morsels
1/2 C white chocolate morsels
1/2 C sliced almonds (I like a lot of almonds, so I used closer to 3/4 C)
Cocoa for dusting
Whipped cream for garnishing

1. In an electric mixer, beat butter and sugar together for about 4-5 minutes until pale and fluffy.  Reduce speed to low and add almond extract, followed by flour.  Mix until combined.

2. Press dough into a 10x1" tart pan with a removable bottom.  Chill until firm, about 30 minutes, or as long as overnight.  Preheat oven to 350 degrees.  Remove tart pan from refrigerator and drop spoonfuls of Nutella evenly over the crust (don't attempt to spread as it might damage the tart).  Bake tart for about 5 minutes, remove from the oven and now spread evenly the softened Nutella over the crust.  Sprinkle chocolate morsels over the Nutella, then top with the sliced almonds. 

3. Bake on the lower rack of the oven until crust is golden, about 20-25 minutes.  Cool, remove side of tart pan and serve at room temperature or warm.  Dust the plate with cocoa and garnish with whipped cream. 


Please click here for a printable version of this recipe - Kitchen Groovy

Enjoy and live with gusto!

Friday, May 27, 2011

Very Pink Lemonade Cupcakes!!

Yesterday, my little Miss Sunshine and I went to see the children's theatre production of "Pinkalicious".  And, as you can imagine, my pink loving, anything glittery loving, little 5 year old girl LOVED every minute of it - the anticipation leading up to the show was almost unbearable for her.  Then, during the show, she couldn't contain her excitement, and she literally oozed her joy during the entire show!  Thankfully, it IS a children's production, and she was accompanied by many little boys and girls who oozed that same joy. :-) 

To celebrate our day, we made Pink Cupcakes (for those of you not familiar with Miss Pinkalicious: she eats a pink cupcake and therefore, turns pink herself!). 

Very Pink Lemonade Cupcakes
Original recipe by Kitchen Groovy
makes 12-18 cupcakes

3/4 C cake flour
3/4 C all purpose flour
1 tsp. baking powder
1/2 tsp. salt
1 1/2 sticks unsalted butter, room temperature
1 1/4 C sugar
2 T pink lemonade powder
1/4 tsp. pure vanilla extract
1/2 C whole milk
4 large egg whites
Pink food coloring, if desired for extra pink cupcakes
Pink Lemonade Frosting, recipe follows

Preheat oven to 350 degrees.  Line a 12 cup muffin pan with paper liners.  Into a medium bowl, sift together flours, baking powder, and salt.  Set aside.

In the bowl of an electric mixer fitted with the paddle attachment, beat butter, pink lemonade powder and 1 C of sugar until light and fluffy, 3-4 minutes.  Scrape down sides of bowl, as needed.  Beat in vanilla.  With mixer on low speed, add flour mixture in three parts - alternating with milk, beginning and ending with flour mixture, until just combined.  Transfer mixture to a large bowl and set aside.

In the clean bowl of an electric mixer fitted with the whisk attachment, beat egg whites on medium low speed until just foamy.  With mixer running, add remaining 1/4 C of sugar; beat on high speed until stiff, glossy peaks form, about 4 minutes.  Do not overbeat.  Gently fold a third of the egg-white mixture into the butter-flour mixture until combined.  Gently fold in the remaining whites.  At some point in this process, incorporate 3-5 drops of pink food coloring, depending on how pink you like your cupcakes :-)

Divide batter evenly among the muffin cups, filling each with a heaping 1/4 C batter.  Bake until cupcakes are a golden brown and a cake tester inserted in the center comes out clean - about 20-22 minutes.  Remove and place on wire rack to cool.

Pink Lemonade Fluffy Frosting

1 C confectioners sugar + 1 T extra
4 T unsalted butter, softened but still cool
4 oz. cream cheese, softened and cut into 4 pieces
2 T frozen pink lemonade concentrate, thawed
Pink food coloring, 2-3 drops

With electric mixer on medium high speed, beat butter and sugar until light and fluffy, aout 2 minutes.  Add cream cheese, one piece at a time, beating thoroughly after each piece.  Add pink lemonade concentrate and beat until combined.  The frosting may be runny at this point, add in extra confectioners' sugar, 1/2 T at a time until desired consistency is achieved.


Not the best picture - but they sure are cute together :-)


Super delicious pink, pink, pink cupcakes!!!


Enjoy and live with gusto!
Carina

Monday, May 16, 2011

Key Lime Tart

It's spring!!!  Yippee!!  While it's raining today, we have FINALLY had some spring like weather - even had a good old fashioned nasty thunderstorm pass on through the other day.  Warm weather: it's nice to see you old friend. 

To pair with our spring like temperatures, I really wanted to make this Key Lime Tart.  Even though I blog and LOVE to cook, there is still SO much for me to try and discover - I have never had key limes before!!! 

This is strictly my own opinion, but this is not for the faint of heart.  Know ahead of time that you will spend quite a bit of time juicing these tiny little limes.  It was worth it in the end, the tart was D.E.L.I.C.I.O.U.S.  If you have kids, they might have more fun squeezing the juice out of these little suckers.  Also - the recipe calls for roughly 12 key limes, but I found that I used roughly 18-22.  (I used the whole bag)

It also called for a homemade graham cracker crust.  I searched and searched for graham flour, with no luck.  Frustrating.  But after doing some research, I found that graham flour is actually just a coarser version of whole wheat flour.  So, I used that instead and I feel like we still got the same result.  The crust was really good :-)

I also made candied lime slices - don't feel like you need to make these - it's just a garnish.  But, I thought it would be fun PLUS - I kept the liquid mixture (it's just a simple syrup) and I will use it for smoothies.  As I type this up, I am in the process of making cupcakes and will infuse this lime simple syrup into my cupcakes - we'll see how it turns out! 

Key Lime Tart
original recipe by Martha Stewart
adapted recipe by Kitchen Groovy

All Purpose Flour, for dusting
Graham Cracker Dough (recipe follows)
4 large egg yolks
1 can (14 oz) sweetened condensed milk
2 tsp. grated Key Lime zest
1/2 C freshly squeezed Key Lime juice
Pinch of salt
Candied Key Lime Slices (recipe follows)

On a lightly floured surface, roll out dough to a 12" round.  With a dry pastry brush, sweep off excess flour; fit dough into a 9" round tart pan with removable bottom, pressing into edges.  Using a sharp paring knife, trim dough flush with the rim.  Prick the bottom of the dough all over with a fork.  Chill the tart shell until firm, about 30 minutes.

Preheat the oven to 350 degrees.  Line tart shell with parchment, fill with pie weights.  Bake until crust is just beginning to turn golden, 12-15 minutes.  Remove parchment and weights.  Return to oven; continue baking until crust is golden brown, 12-15 minutes more.  Transfer to a wire rack to cool completely.

In the bowl of an electric mixer fitted with the whisk attachment, beat yolks on medium-high speed until pale and fluffy, 2-3 minutes.  Add condensed milk, lime zest, lime juice, and salt, and beat to combine, about 1 minute, scraping down the sides of hte bowl as needed.

Pour filling into cooled crust; bake until set, about 10 minutes.  Transfer tart to awire rack to cool.  Once completely cool, loosely cover with plastic wrap; refrigerate until chilled, at least 1 hour or up to 1 day.  Garnish tart with Candied Key Lime Slices.

Candied Key Lime Slices
1 C Sugar
1 C Water
3 Key Limes, very thinly sliced into rounds

In a 10" saute pan, bring sugar & water to a boil, stirring constantly until sugar dissolves.  Reduce heat to a gentle simmer.  Add lime slices in a single layer, arranging them so they do not overlap.  Cook until white pith is translucent, 30-40 minutes, turning slices over 2 or 3 times during cooking.  Using a slotted spatula, carefully transfer slices to a wire rack to cool completely before using. 

Chef Note: Save Lime Simple Syrup for another use i.e. smoothies, iced tea.  I am going to try putting it in a white butter cream frosting!

Whole Wheat Crust

1 1/4 C all purpose flour
1 1/4 C whole wheat flour
1 tsp. baking soda
1 tsp. ground cinnamon
1/2 tsp. salt
2 sticks unsalted butter, room temperature
3/4 C packed light brown sugar
2 T honey

Preheat oven to 350 degrees.  In a medium bowl, whisk together both flours, baking soda, cinnamon, and salt; set aside.  In the bowl of an electric mixer fitted with the paddle, beat butter, brown sugar, and honey on medium speed until light and fluffy, 2-3 minutes.

With mixer on low speed, add the flour mixture; beat until just combined.


Please click here for a printable version of this recipe - Kitchen Groovy

Enjoy and live with gusto!
Carina

Friday, April 22, 2011

Chick and Egg Cupcakes

I did it!!!  I was able to successfully make an Easter related recipe and post it before the actual holiday!  If you don't mind, I'm going to give myself a little pat on the back!  :-)

I found this recipe on the Food Network website - and thought they were really cute.  Little Miss Sunshine LOVED them - no surprise there! 


The original recipe had its own frosting calling for Marshmallow Fluff. I'm not a big fan of "Fluff", but made it anyway to see if this particular frosting would help the overall cupcake look better.  I honestly think a simple buttercream would work just the same, or even a store bought frosting would be fine - just make sure you mix in the food coloring (I used a neon blue food coloring which are on the store shelves now due to the holiday).  I thought the frosting was horrible, and it turned hard after a short period of time.  Not a fan of that!

What ever Easter means to you, regardless how you celebrate, I hope this cute little dessert will help make your day a special one!

Chick and Egg Cupcakes
Original Recipe from Food Network Kitchens

Ingredients
1 vanilla cupcake, recipe follows
White frosting + blue food coloring
Green coconut grass, recipe follows
6 small candied malt balls (2 yellow, 2 pink, 2 white)
1 yellow chick peep
White Airhead candy

Directions
Frost a cupcake with fluff frosting. Press a circle of coconut grass on top. Nestle the malted eggs on top of the grass. Gently press the peep onto the center of the grass. Cut the white Airhead into a 1/2 oval shape; trim one side so it has a cracked egg jagged edge. Place egg next to chick.

Vanilla Cupcakes:
2 2/3 cups sugar
1 cup (2 sticks) unsalted butter, cut into 1-inch pieces
2 large eggs
2 large egg yolks
2/3 cup milk
2/3 cup water
2 1/2 teaspoons pure vanilla extract
2 2/3 cups all-purpose flour
1 1/3 cups cake flour
4 teaspoons baking powder
1/2 teaspoon fine salt
Preheat oven to 350 degrees F. Line two 12-cup cupcake tins with paper liners. (To avoid cupcakes sticking if they overflow slightly, lightly spray the tops of the pans.) Put tins on a baking sheet. Set aside.

Process sugar and butter in a food processor until very creamy, scraping sides as needed, 1 to 2 minutes. Add the eggs and yolks, one at a time, pulsing after each addition. Add the milk, water, and vanilla and process to blend.
Whisk both flours, baking powder, and salt in a medium bowl. Add the dry ingredients, in 3 batches to the wet, pulsing, and then scraping batter off the sides of the processor as needed after each addition. Process until the batter is very smooth and pourable like pancake batter, about 2 minutes.

Evenly pour the batter into the prepared cups, filling them 3/4 of the way full. Bake until the cakes are just firm and spring back when gently pressed, and the tops are golden, 18 to 25 minutes. Cool slightly in tin, and turn out of tin when cool enough to handle. Cool cupcakes completely on a rack before frosting.

Yield: 24 cupcakes
Prep Time: 20 minutes
Cook Time: 25 minutes
Inactive Prep Time: 30 minutes
Ease of preparation: easy
Yield: 3 3/4 cups

Coconut Easter Grass for Cupcakes:
2 cups sweetened shredded coconut
1 to 2 teaspoons liquid green food coloring
1/2 to 1 teaspoon liquid yellow food coloring

Preheat oven to 250 degrees F. Line a baking sheet with parchment paper. Place a mesh rack on top, if available.
Put coconut in a shallow bowl. While tossing with a large spoon, add food coloring drop by drop until the desired color is reached. A little more green than yellow makes a pretty grass color. Add a few tablespoons water to moisten the mixture and help disperse the color evenly. If the color is too dark, add additional water, as needed, to dilute to the desired color. Drain the coconut in a sieve or strainer.

Spread the coconut in an even layer on the rack, or directly on the lined baking sheet. Place in the oven until dry, about 10 to 15 minutes. Use immediately, or store in covered container for up to 3 days.

Cook's Note: Food coloring can be messy and can stain your skin. To prevent this, wear latex gloves. You may find it easier to color the coconut in a large zip top plastic bag, tossing it to color evenly.


Please click here for a printable version of this recipe - Kitchen Groovy

Enjoy and live with gusto!
Carina

"I tell you the truth, whoever hears my word and believes him who sent me has eternal life" - John 5:24a
As we celebrate Easter, may you be blessed in mighty ways!! 

Monday, April 4, 2011

Cranberry Blondie Bars AND a Girly Giveaway!!

Good Mondy morning, my groovy foodie friends!  We are all officially on Spring Break as of today, and we are celebrating by having a Staycation.  I love staycations - we get to experience all the cool things that our hometown has to offer, we get to do the things we don't normally take the time to do and best of all - we get to come home and sleep in our own beds!!  (little known fact about me: I love, love, love my super comfy bed and I look forward to climbing in it every night!).

A couple of things on the docket: attend a basketball game, have a slumber party, go to a Diners, Drive Ins and Dives local restaurant with the kids. 

On to my GIVE-AWAY!!!  I would love to start giving away a few of my favorite things throughout the year - for no other reason but it being pure bliss for me to share what my favorite things are!  They may have to do with cooking, or not. 

A couple of weeks ago, I hosted a Stella and Dot party in my home by my very dear friend, Jennifer Allen.  Have you heard of Stella and Dot?  If you have, then you know how fantastic this company is and how beautiful their jewelry is!  If you haven't - then I urge you to hang on to your seat and read on!

First of all, Jennifer is one of the grooviest women I know.  She is utterly passionate about seeing women succeed.  She has always been this way, which is one of the reasons why I love her so much.  Not only is she passionate about seeing women succeed, but she is passionate about everything she does - she is an amazing mama to her sweet 4 year old, Audrey, she is a Life Coach who loves to coach women to succeed in their own lives, she volunteers with me on our church leadership in a ministry that oversees moms of young children, and now she has added this super fun role onto her already stellar resume!  I am absolutely excited for her! 

What does this have to do with my blog?  Well, I have seriously fallen in love with this jewelry line - one of my favorite things - and I am giving away this beautiful "On The Fringe" Necklace!


Isn't she pretty?  This piece is delicate and lovely - you can wear it every day whether you are on the baseball field, or going to work.  I love how Stella and Dot has jewelry that applies to all ages, styles and personalities - it's truly trendy and relevant for all!  You know you want it!!  Check out the Stella and Dot website - their jewels are worthy of adorning yourself with!

How can you receive this amazing necklace??!!  I'm going to make this VERY easy for you!  Why work hard when you don't have to??  :-)

Post a comment for each of the following:
1. Become a fan of Kitchen Groovy on Facebook (or post that you already are a fan)
2. Become a follower via Google Connect (or post that you already follow)
3. Become a follower via Twitter - YES!  I'm on Twitter now!  User name: kitchengroovy
4. Share this on Facebook and/ or Twitter with all that you know! (then post that you have shared or tweeted about it!)

REMEMBER: MAKE SURE YOU POST THAT YOU DID ANY/ ALL OF THESE!  YOU WILL NOT BE ENTERED WITHOUT POSTING A COMMENT!

** US entries only please - sorry to my international foodie friends!

You will recieve one entry for each that you do - the more you do, the more likely you will win! 

The winner will be announced one week from today - Monday, April 11th!! 

Oh - how about a recipe?  I served these blondie bars at my party, and they were a sensation.  Remember those Starbucks Cranberry Bliss bars they sell over the holidays?  These remind me of those, and I'm really excited that I don't have to spend $3 every time for them!  I found this recipe from a local grocery store but I've tweaked it a little bit to make them my own :-)

Cranberry Blondie Bars
Original recipe by Byerly's
Adapted recipe by Kitchen Groovy

- parchment paper
3/4 C melted butter
2 eggs
4 tsp. vanilla
1 1/2 C flour
1 1/2 C light brown sugar
1 tsp. baking powder
1/2 tsp. salt
1 C white chocolate chips
1/2 C craisins
1/2 C chopped pecans
- Cream Cheese Frosting (below)
1/2 C craisins, chopped

Line 13x9 baking pan with parchment paper, extending up over ends of pan.  In large bowl, stir by hand butter, eggs and vanilla until thoroughly combined.  In small bowl, combine flour, brown sugar, baking powder and salt; stir into butter mixture until thoroughly combined.  Add chips and pecans, stirring to combine.  Spread evenly into prepared pan; bake in a preheated 350 degree oven until top is shiny, cracked and light golden brown (25-30 minutes).  Cool in pan; lift bars out of pan with ends of parchment paper.  Frost with cream cheese frosting; garnish with cranberries.  Cut into bars.

Cream Cheese Frosting
In a medium bowl, beat 3oz. softened cream cheese, 2 T softened butter, 1 tsp. milk and 1/2 tsp. vanilla with electric mixer on low speed until creamy.  Gradually beat in 2 C powdered sugar on low speed until smooth and spreadable.

Chef Note: I think I will replace the pecans with sliced or chopped almonds next time.  Feel free to play with this a bit to make it your own!


They were sensationally sinful and delicious!

Please click here for a printable version of this recipe - Kitchen Groovy

Enjoy, live with gusto - and enter to win!!
Carina

Tuesday, March 22, 2011

Lemon Bars

So yesterday was the first day of spring - yippeee!!!!!  How long have we been waiting for this day to come??!!  Feels like FOREVER.  I intended to post this recipe yesterday to celebrate our little yearly milestone, but a mom of 3 busy kids, well, you know.  :-)  The day got away from me - again.

So, today is rainy and cold.  Welcome spring.  But, maybe this little ray of sunshine dessert will be the perfect pick me up?

I also had leftover filling, so I made some extra crust and set it inside a couple of ramekins and made tarts.  Those were yummy, and my kids loved having their own personal dessert!

Lemon Bars
Original Recipe by Ina Garten
Yields: 20 squares
Cook Time: 55 minutes

For the crust:
2 sticks unsalted butter, room temperature
1/2 C granulated sugar
2 C all-purpose flour
1/8 tsp. kosher salt

For the filling:
6 extra large eggs, room temperature
3 C granulated sugar
2 T grated lemon zest (about 4-6 lemons)
1 C freshly squeezed lemon juice
1 C flour
Confectioner's sugar, for dusting

Directions

Preheat the oven to 350 degrees.

For the crust, cream the butter and sugar until light in the bowl of an electric mixer fitted with the paddle attachment. Combine the flour and salt and, with the mixer on low, add to the butter until just mixed. Dump the dough onto a well-floured board and gather into a ball. Flatten the dough with floured hands and press it into a 9 by 13 by 2-inch baking sheet, building up a 1/2-inch edge on all sides. Chill.
Bake the crust for 15 to 20 minutes, until very lightly browned. Let cool on a wire rack. Leave the oven on.
For the filling, whisk together the eggs, sugar, lemon zest, lemon juice, and flour. Pour over the crust and bake for 30 to 35 minutes, until the filling is set. Let cool to room temperature.
Cut into triangles and dust with confectioners' sugar.


Please click here for a printable version of this recipe - Kitchen Groovy

Enjoy and live with gusto!!
Carina

Wednesday, March 16, 2011

Guinness Sundaes!!

Okay, so I have been thinking about what I want to do for St. Patrick's Day.  Let me start off by saying - I am NOT Irish.  I'm just your every day, run of the mill Swedish and Filipino gal :-)  I'm not a fan of corned beef, beef brisket, or cabbage.  Sorry Ireland.  I y'am what I y'am! 

Being that we are going to a friend's house for to celebrate the day, I won't even be cooking.  But - I felt like I wanted to do something.  So, I found this recipe from the Food Network website - and I tell you, Guinness, sugar, butter.  My husband's three favorite things!!  Ha!  Put it on top of ice cream?  I'm drooling.

I wanted to make this last night, but hubby didn't get home with the Guinness until after 10pm, and this takes about 45 minutes to simmer up, so by the time 10:00 rolled around, I was more into sitting on the couch watching TV than standing in the kitchen. 

So - at 9am this morning, I cracked open a beer and got working.  For those wondering, the beer went into the saucepan - not a glass for me :-) 

It is SOOOO easy to make and an hour later, Miss Sunshine and I were enjoying an ice cream sundae at 10am (don't judge, super moms!).

I LOVE ice cream - but I tell ya, a plain old vanilla with Guinness syrup is now my new favorite dessert.  Thank you Guinness Breweries and Food Network chefs!  This one is a winner!!

Guinness Sundaes
Original Recipe by Food Network

Bring one 15-ounce can Guinness or other stout beer and 1/2 cup sugar to a simmer in a saucepan over low heat and cook until syrupy, about 40 minutes. Whisk in 3 tablespoons diced cold butter. Drizzle the Guinness caramel over vanilla or butter pecan ice cream and serve with shortbread cookies.

Chef's note: I let this simmer for about an hour, instead since I was feeding this to a 5 year old.  I needed to be extra sure the alcohol was evaporated :-) 


All I can say is . . . mmmm . . .

Please click here for a printable version of this recipe - Kitchen Groovy

Enjoy and live with gusto!
Carina

Monday, February 21, 2011

Darth Chocolate Cupcakes + GIVEAWAY Winner Announced!!!


Today, my kids are off from school.  I am thrilled - am I such a bad mom that I love it when my kids are not off receiving an education?  I love it when they are home.  Even better, I love it when their friends are over and that our home is the hub of social networking. 

Last night, my oldest daughter had 2 friends over and they decided to make cupcakes.  Actually, a few more kids were supposed to come over and watch the Star Wars movies, but due to yet ANOTHER snow storm, most of them couldn't make it.  However, that didn't stop me from encouraging them to make Darth Chocolate Cupcakes.  I went to Williams Sonoma the other day and picked up a Star Wars cupcake kit, so there was no turning back!  This recipe is from my Martha Stewart Baking Handbook Cookbook (my go-to baking book) and it was so much fun to watch these up & coming young bakers experiment in the kitchen. 

While I did not have my oven mitts on helping them out, I thought I would post pictures and blog about it anyway - Mr. Groovy and I sampled their cupcakes, and they were nothing short of delicious!

One Bowl Chocolate Cupcakes
Recipe from Martha Stewart's Baking Handbook, pg. 168

2 1/2 C all-purpose flour
1 1/4 C Dutch process cocoa powder
2 1/2 C sugar
2 1/2 tsp. baking soda
1 1/4 tsp. baking powder
1 1/4 tsp. salt
2 large whole eggs, plus 1 large egg yolk
1 1/4 C milk
1/2 C + 2 T vegetable oil
1 1/4 tsp. pure vanilla extract
1 1/4 C warm water

Preheat oven to 350 degrees.  Line two standard 12-cup muffin pans with paper liners.  Into the bowl of an electric mixer, sift together flour, cocoa, sugar, baking soda, baking powder, and salt.  Attach bowl to mixer fitted with the paddle attachment; add the eggs and yolk, milk, oil, vanilla, and warm water.  Beat on low speed until smooth and combined, about 3 minutes; scrape down the sides of the bowl as needed.

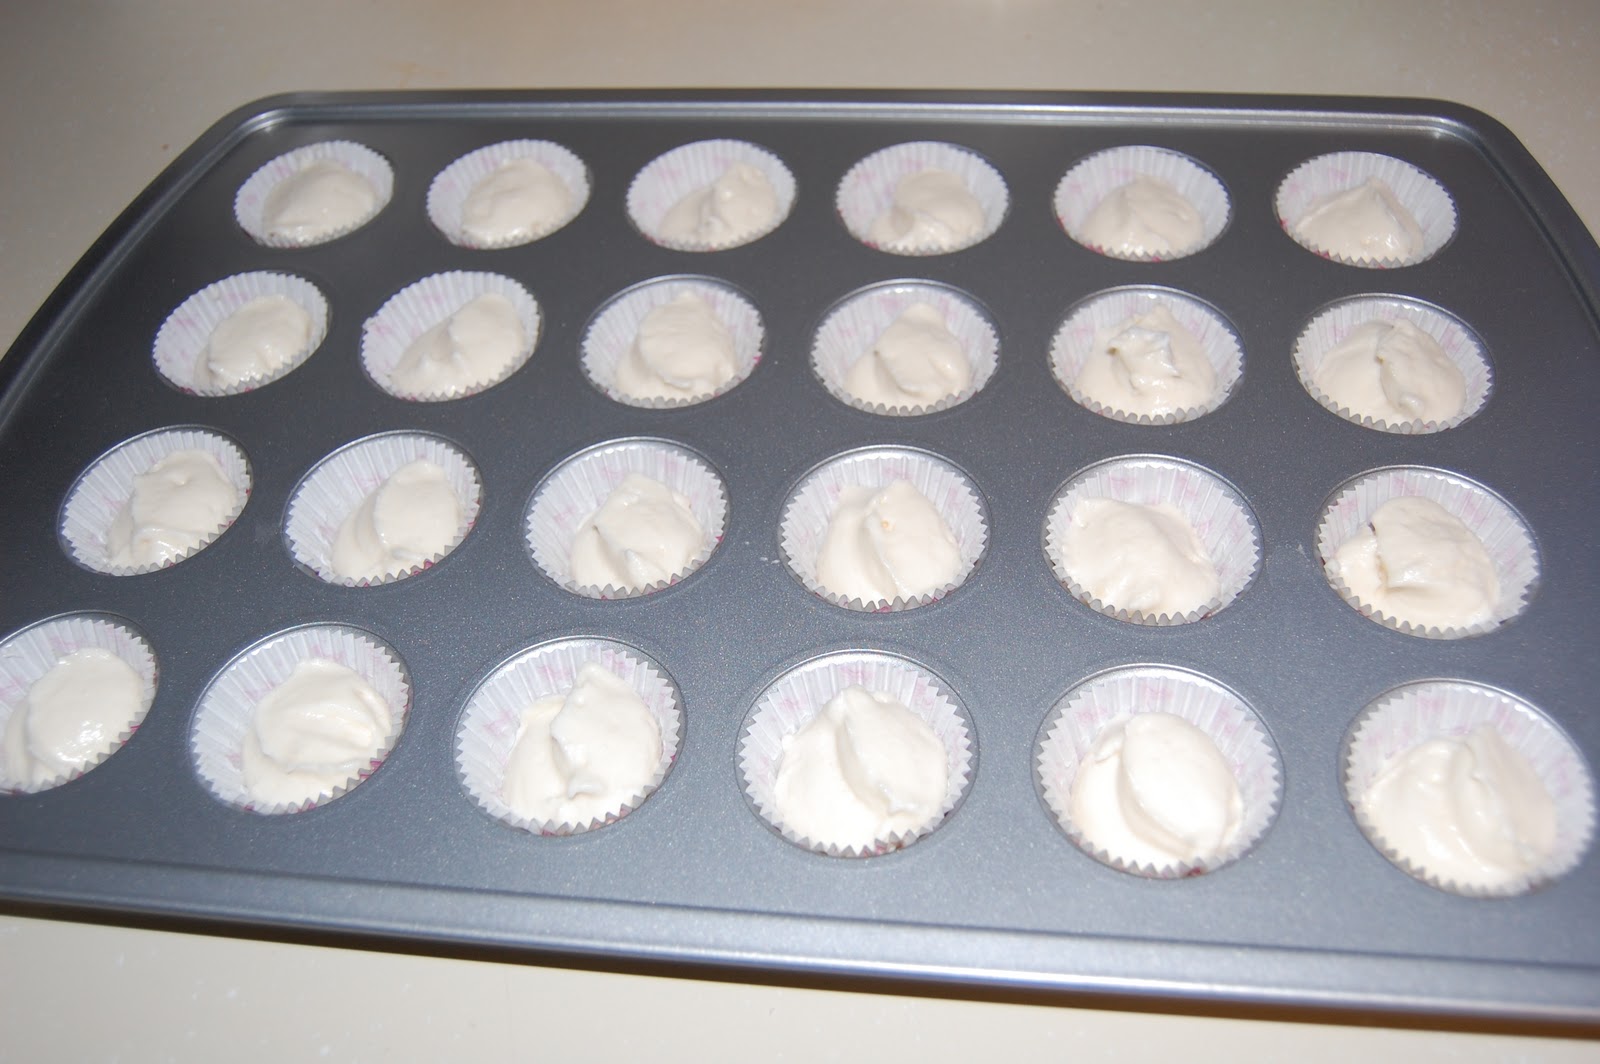
Divide batter evenly among the muffin cups, filling each about 2/3 full.  Bake, rotating pans halfway through, until a cake tester inserted in the center of a cupcake comes out clean, 20-25 minutes.  Transfer pans to a wire rack to cool slightly.  Invert cupcakes on to the rack; then reinvert and let them cool completely, top sides up.  Frost cupcakes (recipe to follow).  Cupcakes can be refrigerated in an airtight container for up to 3 days.

Cream Cheese Frosting
8 oz. package cream cheese, cold
5 T unsalted butter, softened
2 tsp. vanilla
4 C confectioner's sugar, sifted

Beat cream cheese, butter & vanilla in a medium bowl at a low speed just until blended.  Adding 1/3 at a time, the sugar and beat just until smooth and at desired consistency.

The Empire!

Click here for a printable version of this recipe - Kitchen Groovy

Now - for the big announcement!  The winner of my very first giveaway is . . . . Christine Lasley!!  Congratulations!!  Thank you to everyone who participated!  There will be another giveaway in April! 

**I used Random.org to generate who the winner would be.  There were 44 entries. . . Random.org generated #11.

Enjoy and live with gusto!
Carina

Friday, February 11, 2011

"Little Darlings": White Cupcakes with Strawberry Buttercream

Good morning and Happy, Happy Friday to all of you!!!  Last night, I had the honor to speak at our church's "Mom's Night Out: Favorite Things" event.  It was so much fun and I think everyone had a great time of encouragement, ideas and let's face it - a night out with the gals.  Women listened to speakers on a range of topics from design to fashion to finding joy.  I was lucky enough to share my tips and thoughts on building relationships in the kitchen - a philosophy that I am incredibly passionate about!

I also had the honor to bake mini-cupcakes for all of these wonderful and amazing women - there were close to 150 of us gathered.  So many have asked for the recipe- so of course I would want to share how I created these delectable cupcakes that I lovingly refer to as my "little darlings".  Because there is a lot of love put into the baking process, they have been given this term of endearment.

For those of you looking for an "over the top" cupcake and are up for a challenge - I say "go, go, go for it!"  I have also included a couple of variations, so don't feel boxed in to only making cupcakes :-)

Little Darlings: White Cupcakes with Strawberry Buttercream
Recipe from Martha Stewart's Baking Handbook, pg. 169

3 C cake flour (not self rising)
2 tsp. baking powder
1 tsp. salt
3 sticks (1 1/2 C) unsalted butter, room temperature
2 1/4 C sugar
1/2 tsp. pure vanilla extract
1 C milk
8 large egg whites
Strawberry Meringue Buttercream (recipe to follow)
24 small fresh strawberries - washed for garnish

Preheat oven 350 degrees.  Line 2 standard 12-cup muffin pans with paper liners.  Into a medium bowl, sift together flour, baking powder, and salt; set aside.

In the bowl of an electric mixer fitted with the paddle attachment, beat the butter and 2 C sugar until light and fluffy, 3-4 minutes, scraping down the sides of the bowl as needed.  Beat in the vanilla.  With mixer on low speed, add flour mixture in three parts, alternating with the milk and beginning and ending with the flour; beat until just combined.  Transfer mixture to a large bowl; set aside.

In the clean bowl of an electric mixer fitted with the whisk attachment, beat egg whites on low speed until foamy.  With mixer running, gradually add remaining 1/4 C sugar; beat on high speed until stiff, glossy peaks form, about 4 minutes.  Do not overbeat.  Gently fold a third of the egg-white mixture into the butter-flour mixture until combined.  Gently fold in the remaining whites.

Divide batter evenly among the muffin cups, filling each with a heaping 1/4 C batter.  Bake, rotating pans halfway through, until the cupcakes are a light, golden brown and a cake tester inserted in the center of a cupcake comes out clean, 20-25 minutes.  Transfer pans to a wire rack.  Invert cupcakes onto the rack; then reinvert and let them cool completely, top sides up.  Frost the cupcakes with Strawberry Meringue Buttercream, swirling to cover.  Cupcakes can be kept in an airtight container in the refrigerator for up to 3 days.  Garnish with strawberries just before serving.

Makes 2 dozen.

Mini cupcake variation: using a mini-cupcake pan, follow the same directions but bake for roughly 12 minutes.  Makes roughly 125 mini-cupcakes.

Layer Cake variation: Butter two 9x2 inch round cake pans; line the bottoms with parchment paper.  Butter parchment, and dust with flour, tapping out excess; set aside.  Follow same instructions, dividing batter between prepared pans and smoothing with an offset spatula.  Bake, rotating pans halfway through, until cakes are golden brown, 30-35 minutes.  Transfer pans to a wire rack to cool 20 minutes.  Invert cakes onto the rack; peel off parchment.  Reinvert cakes and let them cool completely, top sides up.

Using a serrated knife, trim tops of cake layers to make level.  Place one layer on a plate, and spread with 3/4 C buttercream.  Place other cake layer on top, cut side down.  Spead the entire cake with remaining frosting, swirling to cover.

Strawberry Meringue Buttercream
Makes 5 Cups

4 large egg whites
1 1/4 C sugar
3 sticks (1 1/2C) unsalted butter, room temperature but sliced into tablespoons
1 tsp. pure vanilla extract
1 1/2 C (12 oz.) strawberry jam, pureed in a food processor

In the heatproof bowl of an electric mixer set over a saucepan of simmering water, combine the egg whites and sugar.  Cook, whisking constantly, until the sugar has dissolved and the mixture is warm to the touch (about 160 degrees).

Attache the bowl to the mixer fitted with the whisk attachment.  Beat the egg-white mixture on high speed until it holds stiff (but not dry) peaks.  Continue beating until the mixture is fluffy and cooled, about 6 minutes.

Switch to the paddle attachment.  With the mixer on medium-low speed, add the butter several tablespoons at a time, beating well after each addition.  (If the frosting appears to separate after all the butter has been added, beat on medium-high speed until smooth again, 3-5 minutes more.)  Beat in vanilla.  Beat on lowest speed to eliminate any air bubbles, about 2 minutes.  Stir in strawberry jam with a rubber spatula until frosting is smooth.

Before going into the oven.

An army of "little darlings"!

My "little darling" up close and personal.

This is one of my favorite cupcakes to make.  It's light and reminds me that spring is right around the corner.  Of course, it's perfect for Valentine's Day, too!

Click here for a printable version of this recipe - Kitchen Groovy

Enjoy and live with gusto!
Carina

Saturday, February 5, 2011

Knock Me Down, Pick Me Up Whoopie Pies

It's late on a Saturday evening, and yes, I'm home blogging.  What does that say?  Sheesh!  Originally, the hubs and I had fantabulous plans for most of the weekend, but Miss Sunshine ended up with a fever today making us homebound all weekend.  Or I should clarify: I am homebound all weekend.  Like the good wifey that I am, I urged hubby to go out and visit with our out of state friends.  How often do we get to see them?  Someone had to represent our fam!  So, for me - plans for dinner with out of state friends: cancelled.  Plans for the baking class with my 16 year old daughter: for other unstated reasons, cancelled.  Plans with friends for the Super Bowl: yes, cancelled. 

So - how does an extravert like myself lick the wounds of having to stay at home alone while my sweet precious babe sleeps?  Yes, she bakes.  And it was so totally worth it. 

After feeling knocked down, this picked me right back up.  Gone was the "woe is me" attitude.  I mean really, how often do I get to snuggle up to my favorite preschooler and watch movie after movie?  And, after she had a little Whoopie Pie, her fever magically disappeared!  A pick me up for mom AND Miss Sunshine = win, win!! 
Woo hoooo!

I found this recipe from another blogger, but I added small chunks of white chocolate - which provided the slightest hint of crunch, which I really like. 

Oh yeah, and it's perfect for Valentine's Day!!  For all of you shy bakers - this is an easy one!  Trust me!

Whoopie Pies
Adapted from "Sweet Pea's Kitchen"'s recipe

For the Whoopie Pies:
2 C All Purpose Flour
2 T unsweetened cocoa powder
1/2 tsp. baking soda
1/4 tsp. salt
1 stick unsalted butter, softened
1 C packed light brown sugar
1 egg
1 tsp. vanilla
1/2 C buttermilk
2 T red food coloring

For the icing:
8 oz. cream cheese, softened
3 C powdered sugar
4 tsp. vanilla extract
1/4 C white chocolate chips, finely chopped

Directions:
Preheat oven to 375 degrees F. Line baking sheets with parchment; set aside. In medium bowl combine flour, cocoa powder, baking soda, and salt; set aside.
In large mixing bowl beat butter on medium to high 30 seconds. Beat in brown sugar until light and fluffy. Beat in egg and vanilla. Alternately add flour mixture and buttermilk, beating after each addition just until combined. Stir in food coloring.
Drop heaping tablespoons of the dough onto the prepared baking sheets, about 1-inch apart.
Bake 9 to 11 minutes, or until tops are set. Cool completely on baking sheets on rack. Remove cooled cookies from baking sheets.
To make the cream filling: In the bowl of a stand mixer fitted with the paddle attachment, combine the cream cheese and powdered sugar until smooth. Add vanilla extract and beat until combined. Stir in chopped white chocolate.  Transfer to a piping bag and pipe onto back of 1/2 the cookies.

Enjoy and live with gusto!
Carina