Good Monday morning to all! This is our first "official" day of summer vacation - and we welcome it with open arms! Of course, we started off our morning bright and early with swimming lessons for Miss Sunshine!!
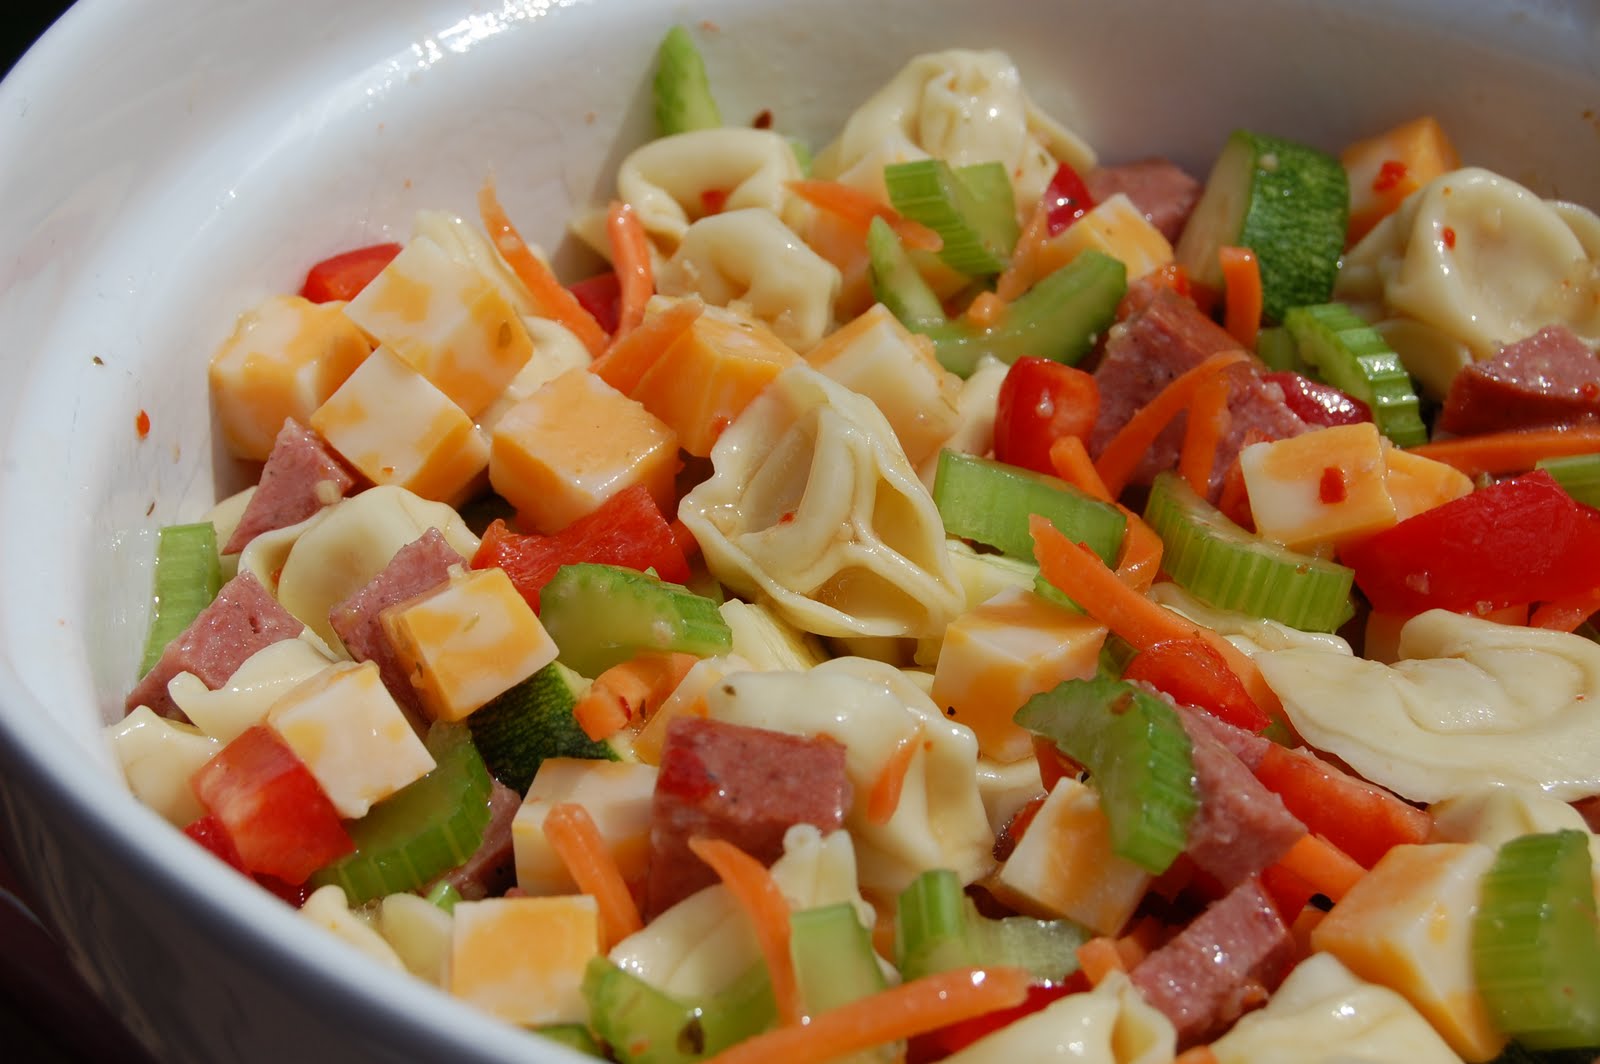
I found this recipe from an awesome food blog - and once I saw it, I knew I HAD to try it. I didn't make it exactly the way Pip made it, but it sure inspired me to make something similar. You should really check out this blog, Pip and Ebby - I have found so many great recipes from this dynamic duo. Click here for their original recipe - I highly recommend you try it!!
I made a few adjustments, based on my own families likes and dislikes. I LOVE LOVE LOVE finding recipes that give me inspiration to make something for my own family that they will love. And sure enough - this is the best recipe I'm posting so far as part of my "Picnic at the Park" series!! Here is my attempt at something similar :-)
Italian Tortellini Pasta Salad
Original Recipe by Pip and Ebby
Adapted Recipe by Kitchen Groovy
20 oz. package of cheese tortellini
8 oz. summer sausage, cubed
8 oz. colby jack cheese, cubed
1 zucchini, quartered
1 red bell pepper, diced
3 stalks celery, sliced
1 C shredded carrots
1/2 bottle of Zesty Italian Dressing
Cook tortellini according to package directions. Run under cool water to cool pasta. Transfer to large bowl and add remaining ingredients. Toss with italian dressing. Chill in refrigerator, then serve.
I didn't have any on hand, but I thought brocolli would be a great addition, too. I love it that it is packed full of veggies and protein :-) It was PERFECT for a nice summer picnic! Thank you Pip and Ebby for giving me inspiration to feed the family!!
Please click here for a printable version of this recipe - Kitchen Groovy
Enjoy and live with gusto!
In my quest to find recipes that are suitable for my "Picnic and the Park" series, I realized that everything I make isn't going to make the cut. I have made a few things that my kids have actually gagged on. Go figure! I made a healthy wrap - seems safe enough, right? But for some reason, it tasted horrible! We couldn't figure out why it would taste so bad. It just had meat, lettuce, red peppers - nothing fancy. Bad, bad, bad. It made me realize that my pursuit for easy recipes wasn't going to be as easy as I originally thought. Hmmm . . .
I did come up with this one, and it passed with flying colors. Now remember - the recipes that become a part of this series are not original by any stretch of the imagination. Just simple :-) It will take a bit of time to prep ahead of time, but well worth the $50 we will avoid spending if we eat out. And yes, $50 for my family is what we would spend. Thus, my strong desire to bring dinner each night!
Again, the goal is to give you ideas on what to bring to the park. You can stick with the recipe, or switch out any ingredients to your liking!
Grilled Italian Sandwich
Original Recipe by Kitchen Groovy
1 loaf of your favorite artisan bread
Marinara Sauce
Provolone Cheese, sliced
Salami
Ham
Olive Oil
Take 2 slices of bread, spread marinara sauce on both slices. On one slice, layer cheese, meat, then more cheese. Top with second slice of bread. Brush with olive oil.
Grill on a pan or in a panini press until cheese is melted or sandwich is heated through.
Wrap in aluminum foil until you are ready to eat. Serve with your favorite pasta salad, green salad or raw veggies.
Okay, at this point in the game, I know they don't look "picture perfect", but we're going for convenience and easy :-)
Please click here for a printable version of this recipe - Kitchen Groovy
Enjoy and live with gusto!
Welcome to my very first recipe series! Picnic at the Park! I am very excited to bring this to you and I hope that you will find inspiration here, or at least a couple of recipes that you and your family enjoy.
Picnic at the Park recipes have THREE requirements. They must be 1) easy to make 2) easy to travel and 3) easy to eat (especially by my youngest). Typically, during the months of May, June and July - our family spends alot of time on a baseball field or softball field. This past weekend, we spent twelve hours in the hot sun cheering on our softball team of 16 year old girls. And yes, they came in first place - woot woot! Dinners become challenging when we are living on a field somewhere - and I refuse to eat out unless absolutely necessary. It will bankrupt us, as we just don't budget to feed a family of 5 every single night at fast food restaurants. With these three requirements for dinner, I hope you will enjoy them. I will warn you - they will be simple and nothing fancy. Well, are any of my recipes fancy??!! I think not ;-)
I am kicking off this series with one of my favorite salads. Could the name be any longer?? Honestly, I just didn't know what else to call it so this is about as creative as I get! I first tried this pasta salad at a leadership meeting for the mom's group I once belonged to a couple of years ago - and I have been making it ever since. It's light, delicious and perfect for summer.
I also made brats with peppers. In total, this meal took roughly 30 minutes to make. I started at 3:00 by making the salad, then made the brats at 4:45 and wrapped them in foil. Miss Sunshine had a plain hot dog :-)
Apple Craisin Chicken Pasta Salad
original recipe source: unknown
1 box favorite pasta (I let my kids pick out fun shaped pasta)
1 bottle Poppy Seed Salad Dressing
2 green apples, cored - diced (leave skin on)
1 C craisins
3/4 C slivered almonds
1 large can of chunk chicken (if you have more time, use chicken breast or rotisserie chicken)
Cook pasta according to package directions. Drain pasta, and run under cool water to remove the heat. In a large bowl, mix together all ingredients. Chill in refrigerator for a few hours. Enjoy!
As an alternative, this salad is also really good with Vidalia Onion dressing - which is how the recipe came to me originally. The great thing about salad is you can adjust according to what you like! Add green onions or carrots or brocolli florets - go wild!
Okay, since we were sitting on the bleachers while we ate, the pictures are not that great - but it was a successful dinner!
Please click here for a printable version of this recipe - Kitchen Groovy
Enjoy and live with gusto!
May, June and July tend to be our busiest months of the year - we literally live on a baseball or a softball field most evenings and most weekends. They are my most challenging months in terms of cooking. So - starting next week, I'll be starting a "Picnic at the Park" series. I will feature recipes that are easy to make, easy to travel and easy to eat. So, no spaghetti dinners - I tried that once, and it was a DISASTER to have a 3 year old try to eat spaghetti outside. Mama mia! I would LOVE to hear your ideas for meals that meet these 3 criteria!
I have been in search of a good cornbread recipe - I made one from a trusted, well known chef, and it turned out horrendous. Everyone tried to choke it down, myself included, until we all decided that it wasn't even good enough for the dog to eat. Oy vey!
I found this recipe in my Martha Stewart Baking Handbook, and I have not found one bad recipe in this book yet. It really is my go-to cookbook when I am looking to bake. I found this recipe - and of course, it's a winner. Waaaa-hooooo!!!
Here's what I love about making cornbread - it's simple. That's it. No fancy kitchen tools. Only takes a few minutes of my time before I toss it in the oven. And - then we get to slather it in butter and eat it nice and hot. Aaaahhhh. . . .
Oh - I guess I did make one little adjustment. The original recipe calls for shortening. I am not sure how you feel about shortening, but I hate the stuff. So, I replaced it with butter - which I'll indicate below in the recipe. :-)
Cornbread
Recipe by Martha Stewart's "The Baking Handbook", pg. 51
1/3 C vegetable shortening (I used 1/3 C butter, instead)
1 T unsalted butter
1 C corn kernels, fresh or frozen
1 C all purpose flour
1/3 C sugar
2 tsp. baking powder
3/4 tsp. salt
1 C stone-ground yellow cornmeal
1 C milk
1 large egg, lightly beaten
1. Preheat the oven to 425 degrees. Coat an 8" square baking pan with vegetable shortening (I used Pam with Flour spray); set aside. Melt 1 T butter in a medium saute pan over medium-high heat; add corn. Cook, stirring occasionally, until corn has softened and some of the kernels have begun to turn light golden brown, about 5 minutes. Remove from heat, and set aside to cool slightly.
2. In a medium bowl, whisk together flour, sugar, baking powder, and salt. Stir in the cornmeal. Using a pastry blender, cut shortening (I used butter instead) into mixture until it resembles coarse meal. Add milk, egg, and reserved corn; stir to combine. Do not overmix.
3. Transfer batter to the prepared pan, and bake until the top begins to turn golden and a cake tester comes out clean, 18-20 minutes. Transfer to wire rack to cool completely. Cornbread is best served the day it is baked, but it can be kept at room temperature, wrapped well in plastic, for up to one day.